Welcome to your dashboard manager page! This is the place where you create, manage and organize your dashboards.
1 – Groups
Good organization is key to efficiency, which is why you can create groups to organize your dashboards. For example: create a group for a specific customer, create a group for the person who handles several customers/projects at once, etc.
You can create as many groups as you need. If you need to delete a group, you can do this without worrying about deleting your dashboards, they will simply be found in the All Dashboards group.
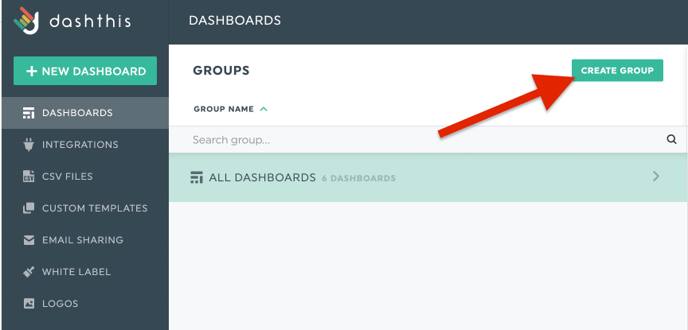
To create a new group, click on the button Create Group
*All Dashboards is where you will find every dashboard created.
Drag and drop
Moving your dashboards around is simple because you can drag and drop them in whichever group that you want!
If you want to copy a dashboard, so that it appears in two or more groups, click on the menu next to the dashboard’s name, in the right-hand column, and choose the option Add to group. 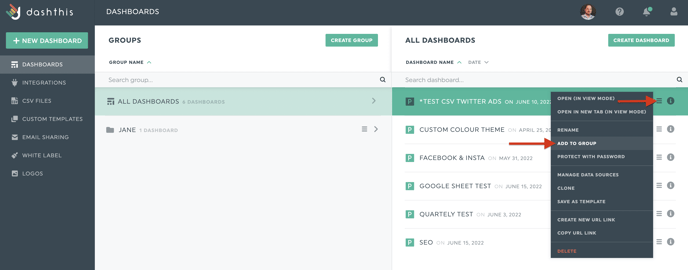
Manage your groups
Next to each group name, you have a group menu where you can manage each group. This is where you go if you want to rename your group, protect it with a password, get an URL to share it with your clients, etc.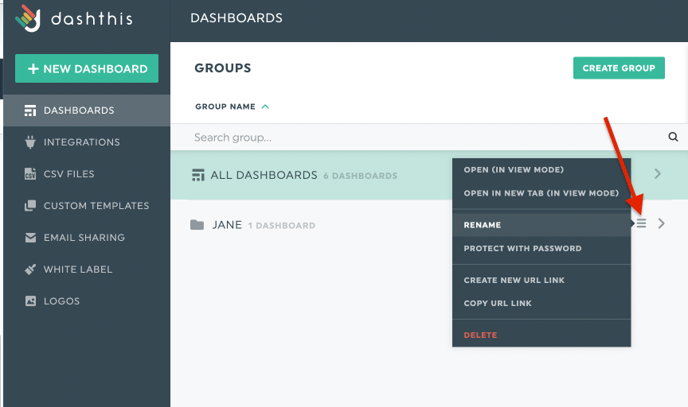
2 – Dashboards
The right-hand column is all about your dashboards! To create a new dashboard, click on Create Dashboard at the top right-hand corner: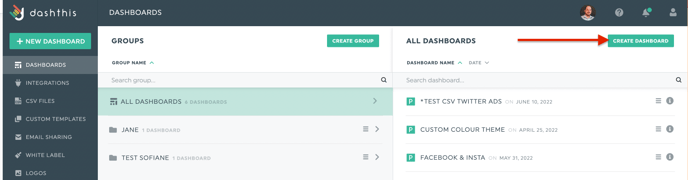
*Note: You can also click on + New dashboard on the left-hand side, this option is available for quick access to create a dashboard in case you are on a different page than the dashboard manager one.
3 – Top navigation bar

The tool bar is always available no matter which page you are on (including a dashboard).
- The DashThis name and logo the to left-hand side is useful for when you are inside a dashboard and want to go back to your menu options (simply click here and your home menu will open and you can choose which page you want to go to)
- To the right, the first icon you will see is the lovely face of a support specialist! Click here if you want to reach out to someone by sending them an email.
- The ? icon is your Help & Resources tool. Here you will find quick access to our Getting started video, Help Center and our Blog.
- The notifications icon will be where you can quickly fin our last and recent announcement regarding new features, new integrations, crucial updates, etc.
- The last icon is for your account settings. This is where you will go to see your profile info, plan and billing, Invoices, mailing list subscription, change your password, add and manage users, add security settings, refer a friend with our affiliate program and lastly, logout.
If you have any questions or need a little help getting the feel for the dashboard manager, our support team is always there for you!
